LED recessed lighting retrofit is a popular choice for upgrading your home’s lighting system.
We explore the benefits of installing LED recessed lighting retrofit, such as energy efficiency, longer lifespan, versatility, and cost savings.
We also discuss the tools and materials needed for the installation process, along with a step-by-step guide for a successful installation.
Discover some tips for a successful installation and common mistakes to avoid.
Learn how to enhance your home lighting with LED recessed lighting retrofit.
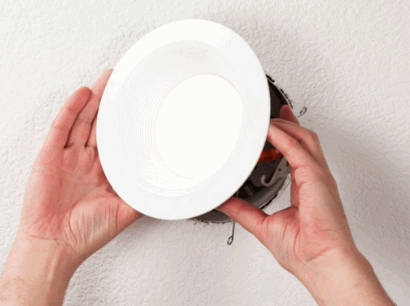
What Is LED Recessed Lighting Retrofit?
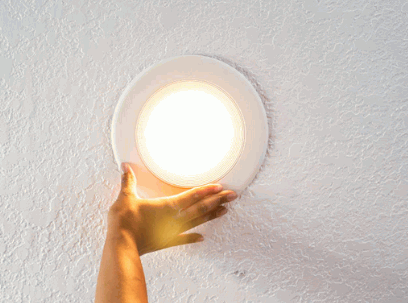
LED Recessed Lighting Retrofit is a modern solution that involves upgrading existing recessed lights with energy-efficient LED downlights, offering enhanced brightness and an extended lifespan.
LED Recessed Lighting Retrofit not only provides improved energy efficiency and longevity, but it also contributes to creating a more eco-friendly living or working environment. By utilizing LED technology, this retrofitting process significantly reduces electricity consumption and lowers utility costs. With a lower heat output compared to traditional lighting, LED downlights are safer and more comfortable to handle, making them ideal for homes, offices, and commercial spaces alike.
Why Should You Consider Installing LED Recessed Lighting Retrofit?
Considering the installation of LED Recessed Lighting Retrofit is a proactive step toward achieving a more energy-efficient, cost-effective, and stylish home, offering a significant lighting upgrade that complements modern interior design trends.
Explore: Is LED Lighting Sustainable
Energy Efficiency
One of the most compelling reasons to opt for LED Recessed Lighting Retrofit is its outstanding energy efficiency, which significantly reduces electricity consumption and contributes to a more sustainable environment.
LED technology enhances energy efficiency by converting a higher percentage of energy into light rather than heat, as seen in traditional lighting options. This means that with LEDs, you get more illumination for the same amount of energy used, ultimately leading to lower electricity bills.
Plus the cost savings on electricity bills and the environmental benefits of reducing energy consumption with LED lighting are substantial. LED bulbs last significantly longer than incandescent or fluorescent options, reducing the frequency of replacements and minimizing waste.
Longer Lifespan
LED downlights are renowned for their extended lifespan, often lasting several times longer than traditional lighting solutions, thereby reducing the frequency and cost of fixture replacements.
This durability and longevity are key factors that contribute significantly to the financial benefits associated with using LED lights. Since they require fewer replacements compared to incandescent or fluorescent bulbs, businesses and homeowners can save a substantial amount of money in the long run.
Plus the direct cost savings on replacements and the reduced maintenance needs of LED downlights also translate into lower overall operational costs. This aspect is particularly advantageous in commercial settings where large numbers of lights are used and maintenance expenses can quickly add up.
Versatility
The versatility of LED Recessed Lighting Retrofit allows for a wide range of applications, making it an ideal choice for enhancing both residential and commercial interior design with smart LED lights.
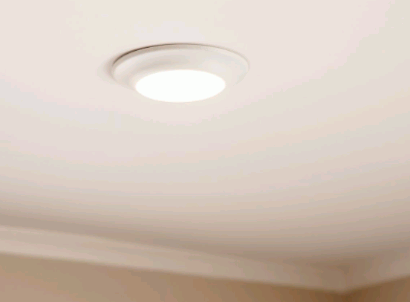
LED recessed lighting is particularly well-suited for use in spaces where a sleek and modern design aesthetic is desired. Its low profile and ability to be dimmed or programmed for various lighting effects make it a popular choice for creating ambiance in restaurants, hotels, and spas. In residential settings, smart LED lights can be integrated into a smart home ecosystem, allowing for voice control, scheduling, and energy efficiency. Whether used for task lighting in kitchens, accent lighting in living rooms, or general lighting in offices, LED recessed lights offer versatility and reliability.
Cost Savings
LED Recessed Lighting Retrofit presents a cost-effective solution due to its energy-efficient nature, leading to substantial savings on electricity bills over time.
Switching to LED technology not only lowers energy consumption but also contributes to significant reductions in maintenance costs. The long-term savings associated with this increased efficiency can be quite remarkable, making it a wise investment for both residential and commercial buildings alike. The lower energy consumption of LEDs translates to lesser strain on your budget, as you can see substantial reductions in your electricity expenses month after month. The reduced maintenance costs mean fewer replacements and repairs, ensuring a more hassle-free lighting solution that saves you both time and money in the long run.
What Tools And Materials Do You Need For The Installation?
To successfully install LED Recessed Lighting Retrofit, it’s essential to gather the right tools and materials, ensuring a smooth installation process and avoiding common DIY mistakes related to electrical work.
LED Recessed Lighting Retrofit Kit
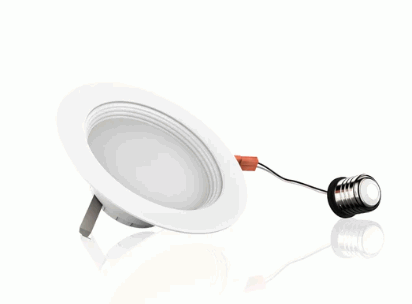
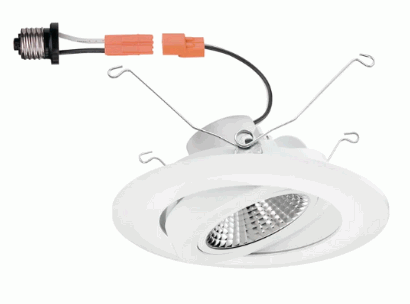
An LED Recessed Lighting Retrofit Kit typically includes the LED downlights, mounting brackets, and necessary connectors, providing a comprehensive solution for fixture replacement.
LED downlights are the core of the retrofit kit, emitting bright and energy-efficient light. The mounting brackets allow for easy installation in existing fixtures, ensuring a secure and stable placement for the LEDs. The connectors enable a seamless electrical connection between the new LEDs and the wiring system, eliminating the need for complex rewiring. Together, these components facilitate a smooth transition from traditional lighting to LED, enhancing both the aesthetics and energy efficiency of the space.
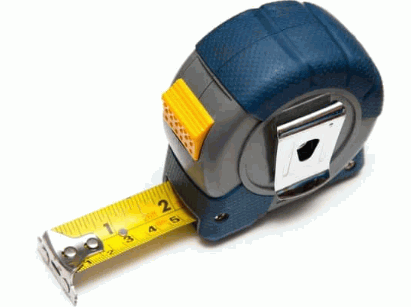
Measuring Tape
A measuring tape is crucial for accurately sizing the placement of new LED fixtures, ensuring they fit perfectly and align with interior design plans.
When using a measuring tape for installing LED fixtures, start by measuring the dimensions of the area where the fixtures will be placed.
- Ensure that the measurements are taken from multiple points to account for any irregularities in the space.
- It’s also important to double-check the measurements before proceeding to drilling or fixing anything in place.
- When aligning fixtures, make use of the measuring tape to maintain equal distances between each fixture for a balanced and visually appealing look.
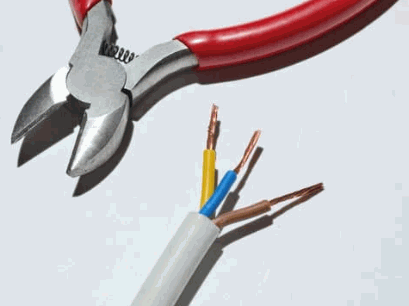
Wire Cutters
Wire cutters are essential for safely trimming and preparing electrical wiring during the installation of LED Recessed Lighting Retrofit.
When using wire cutters, it’s crucial to select the right type for the job. Diagonal cutting pliers are great for cutting wires close to terminals, while wire stripping pliers can cleanly remove insulation without damaging the wire underneath. Always make sure the wire cutters are insulated and in good condition to avoid any electrical mishaps.
Before cutting any wires, ensure the power is turned off to the circuit you are working on. It’s also important to properly strip the wire ends using wire strippers. This helps create a secure connection when attaching them to outlets or switches.
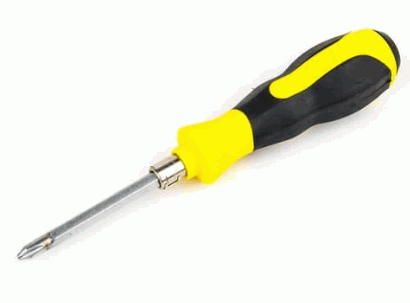
Screwdriver
A screwdriver is necessary for securing the mounting bracket and other components with sheet metal screws, ensuring a stable installation.
There are various types of screwdrivers that may be needed during the installation process, such as flat-head, Phillips, and Torx screwdrivers. For instance, a flat-head screwdriver is ideal for screws with a single, flat indentation on the head, whereas a Phillips screwdriver, characterized by a cross-shaped tip, is often used for securing many types of screws. A Torx screwdriver, featuring a six-pointed star-shaped tip, is commonly utilized for specialized screws in certain electronic devices.
To use a screwdriver effectively, it’s essential to align the tip of the screwdriver with the screw head properly and apply steady pressure while turning it clockwise to tighten the screw securely. Conversely, to loosen a screw, turn the screwdriver counterclockwise while maintaining pressure.
The role of screwdrivers in the installation process is crucial, as they help ensure that components are firmly secured in place and properly aligned. By using the appropriate screwdriver for each type of screw, you can achieve a professional and secure installation that will withstand the test of time.
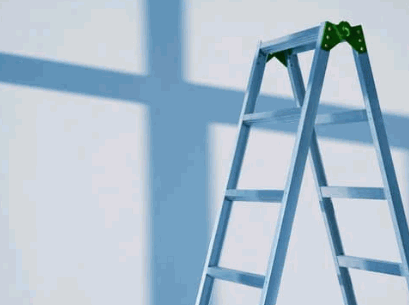
Ladder
A ladder is essential for reaching ceiling fixtures during the installation of LED Recessed Lighting Retrofit, providing safe and stable access to work areas.
When using a ladder, it is crucial to ensure that it is set up correctly to prevent accidents. Begin by inspecting the ladder for any damages or defects before use. Make sure all locks are engaged, and the feet are on solid, level ground.
Position the ladder at the correct angle – the 4-to-1 rule is a good guideline, meaning for every 4 feet of height, the ladder base should be 1 foot away from the wall. Always maintain three points of contact while climbing and avoid overreaching to maintain stability and safety.
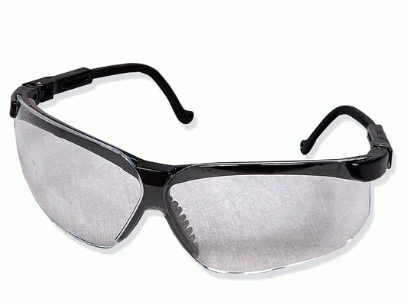
Safety Glasses
Safety glasses are vital for protecting your eyes from debris and potential hazards during the installation of LED recessed lighting fixtures.
Investing in a good pair of safety glasses can make a significant difference in maintaining eye safety. There are various types of safety glasses available, such as wrap-around, anti-fog, and polarized options, each offering specific benefits.
Alongside safety glasses, it is also crucial to consider using gloves and a helmet for comprehensive protection during lighting fixture installation. Ensuring that the workspace is well-lit and clutter-free can further reduce the risk of accidents.
Remember, prioritizing safety measures is key to a successful and injury-free installation process.
Step-By-Step Guide For Installing LED Recessed Lighting Retrofit
This step-by-step guide provides a comprehensive tutorial for installing LED Recessed Lighting Retrofit, covering each stage from turning off the power to testing the final installation, ensuring a safe and effective lighting upgrade.
Turn Off Power
The first step in installing your LED Recessed Lighting Retrofit is to ensure that you turn off the power to avoid any electrical hazards during the process.
Turning off the power at the circuit breaker is crucial for your safety and the safety of your home. This precautionary measure ensures that you are protected from potential electrical shocks or accidents while working with the lighting installation.
To properly turn off the power, locate the main electrical panel in your home. Open the panel door and identify the breaker that controls the electricity to the area where you will be working.
Carefully switch off the corresponding breaker to cut off the power supply. Simply turning off the switch is not enough. It’s paramount to confirm that the power is indeed off before proceeding with the installation. This can be done by using a voltage tester or consulting a qualified electrician to verify that there is no electricity flowing to the circuits.

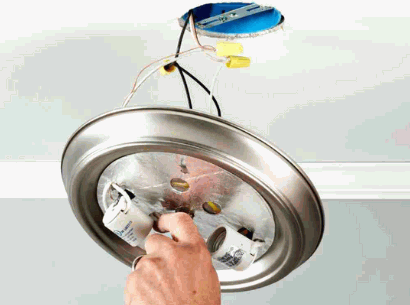
Remove Old Fixture
Carefully remove the old fixture by unscrewing it and disconnecting the wiring, making sure to support the fixture to prevent it from falling.
Before beginning the removal process, ensure the electricity to the fixture is turned off at the circuit breaker to avoid any electrical hazards.
Once the power is off, use a screwdriver to detach the screws that hold the fixture in place, gently lowering it down. Handle the wiring with caution, making note of which wires are connected to which terminals.
After disconnecting the wiring, check for any hidden screws or clips that might be securing the fixture further.
It’s important to properly dispose of the old fixture by recycling it or taking it to a designated disposal site to minimize environmental impact.
Install Mounting Bracket
Install the mounting bracket into the existing recessed housing, using C-clips and torsion springs to secure it in place.
Begin by carefully positioning the mounting bracket within the housing, ensuring it aligns properly with the opening. Insert the C-clips around the edges of the bracket to hold it securely in place.
Next, attach the torsion springs to the designated points on the bracket, making sure they provide enough tension for a snug fit. Test the stability of the bracket by gently tugging on it to ensure it does not shift or wobble.
Once everything is in order, proceed with mounting the fixture onto the bracket following the manufacturer’s instructions for a successful installation.
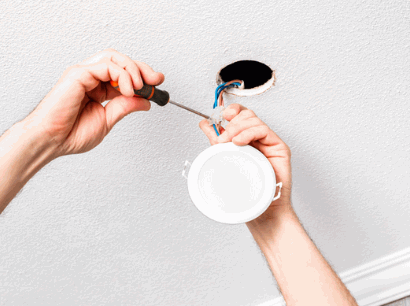
Connect Wires
Connect the wires from the LED retrofit kit to the existing electrical wiring using an E26 adapter or TP24 connector, ensuring all connections are secure and insulated.
Before starting the wiring process, it is crucial to switch off the power supply to the circuit to avoid any electrical hazards. Always use insulated tools to handle the wires and connectors to prevent any shocks. When attaching the wires, make sure to strip off enough insulation to create a solid connection without any exposed copper.
- Double-check the polarity of the wires to avoid any potential damage to the LED lights.
- Utilize a voltage tester to confirm that the power is indeed off before making any connections.
- After completing the connections, carefully conceal the wiring to prevent any accidental damage or exposure.
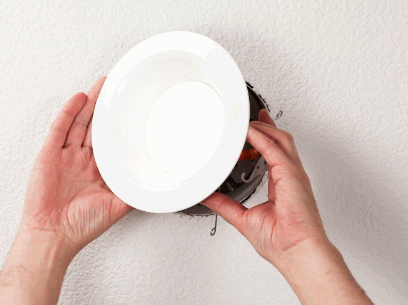
Attach LED Retrofit Trim
Once the wiring is connected, attach the LED retrofit trim to the mounting bracket, aligning it properly to achieve a clean, professional look.
To secure the trim, you may need to use screws or clips provided in the kit. Ensure that the trim sits flush against the ceiling or wall for a seamless finish. Double-check the alignment and make any necessary adjustments to guarantee that the trim is perfectly straight.
Turn On Power And Test
After completing the installation, turn on the power and test the new LED recessed lighting to ensure everything is functioning correctly.
Before you turn on the power, make sure that the installation has been done correctly and all connections are secure. It’s important to safely handle electrical components to avoid any accidents.
Once you switch on the power, observe the lights carefully to see if they all turn on, and if there are no flickering or dimming issues. If you notice any problems, refer to the manufacturer’s instructions for troubleshooting. It’s recommended to consult a professional if you encounter any major issues.
Tips For A Successful Installation
To ensure a successful installation of your LED Recessed Lighting Retrofit, avoid common DIY mistakes by following a detailed visual tutorial and adhering to best practices in electrical work.
One essential tip for a seamless installation process is to carefully map out the placement of your LED recessed lights before starting any electrical work. This planning stage ensures that you achieve optimal lighting coverage and placement for your space.
Another crucial consideration is to switch off the power supply to the area where you will be working. Safety should always be a top priority when dealing with electrical installations, and cutting off the power helps prevent accidents and injuries.
Common Mistakes To Avoid
Avoiding common mistakes during the installation of LED recessed lighting can save you time, and money, and ensure a safe and professional outcome.
Some common installation errors to avoid include incorrect wiring connections, inadequate support for the fixtures, and using incompatible dimmer switches. Each of these errors can lead to various consequences such as flickering lights, electrical shorts, or even potential fire hazards.
To prevent these issues, it is crucial to carefully read and follow the manufacturer’s instructions, use appropriate tools for the job, and ensure that the electrical power is switched off before starting any work.
Conclusion
Opting for an LED Recessed Lighting Retrofit is an excellent decision for anyone looking to achieve a significant lighting upgrade that is both energy-efficient and cost-effective.
LED technology offers numerous benefits beyond just energy efficiency and cost-effectiveness. LED lights have a longer lifespan, reducing maintenance costs and providing consistent illumination over time. They are eco-friendly due to their minimal environmental impact. By upgrading to LED lights, you can enhance the ambiance of your space while also contributing to a greener planet.
